

 by
by Create a cloud by installing Nextcloud hub on your home server!!

This is basically a part two to my “Built a Home Server!“. The main reason I am doing this is to try reduce my reliance on big tech cloud services like Google or Microsoft and self host as much as I can. That way I have more control over my data. Nextcloud Hub provides online services that are similar to Google. Here were the next goals for my home lab server:
- Get a new public web domain
- Create Cloudflare Dynamic DNS IP Updater
- Install a reverse proxy
- Install Nextcloud hub
Buy a domain name!
First, I needed to purchase a domain name so I can access my cloud publicly over the web. I purchased one from Hostinger because I already use them to host this blog site, but you can easily get one at any place like GoDaddy or NameCheap. They cost around $15 a year. Then I changed the namesservers to use Cloudflare’s. The nameservers used by Cloudflare adds an extra layer of security by proxying the IP address in the DNS records. This basically hides your IP address from the public.
Create Cloudflare Dynamic DNS IP updater!!
Unless you pay for a static IP address to your home from your ISP, you will need get some sort of DDNS service to update your IP address to your home. Otherwise, if your IP address changes, your domain host will no longer point to your home services. Since, I already had a Cloudflare account. I used Cloudflare Dynamic DNS IP Updater on git hub. You can put this on any Linux OS device connect to your network. I chose one of my Raspberry Pis to install.
- Step 1 – Step up the script
- 1 – Install Git
- apt update && apt install git -y
- 2 – Clone the script using GIT
- git clone https://github.com/K0p1-Git/cloudflare-ddns-updater
- 3 – Change directories into the script directory
- cd cloudflare-ddns-updater
- 4 – Make a copy of the script
- cp cloudflare-template.sh cloudflare.sh
- 5 – Edit the script
- nano cloudflare.sh
- 6 – Make the script executable and launch it
- chmod x+ cloudflare.sh
- 7 – Launch the script
- ./cloudflare.dh
- 1 – Install Git
- Step 2 – Automate your script
- 1 – Launch crontab
- crontab -e
- 2 – Add this line of config to the end of your crontab settings
- 1/* * * * * /bin/bash /root/cloudflare-dns-updater/cloudflare.hs
- 3 – save
- 1 – Launch crontab
Watch NetworkChuck’s video DDNS on a Raspberry Pi using the Cloudflare API (Dynamic DNS)
Install Nginx Proxy Manager!
Next, I need a reverse proxy to tell the client (web browser) where to go once Cloudflare send the traffic to the IP address of my house using my domain name; That is where Nginx Proxy Manager comes in. It is a server with a user interface that manages as a middle man who sits in front of a group of client machines on the internet. When those computers make requests to services on my home network, the reverse proxy server intercepts those requests and then communicates with servers on behalf of those clients. This is also good because I only have to open ports to one IP address in the firewall on my router and not to any of my other servers.
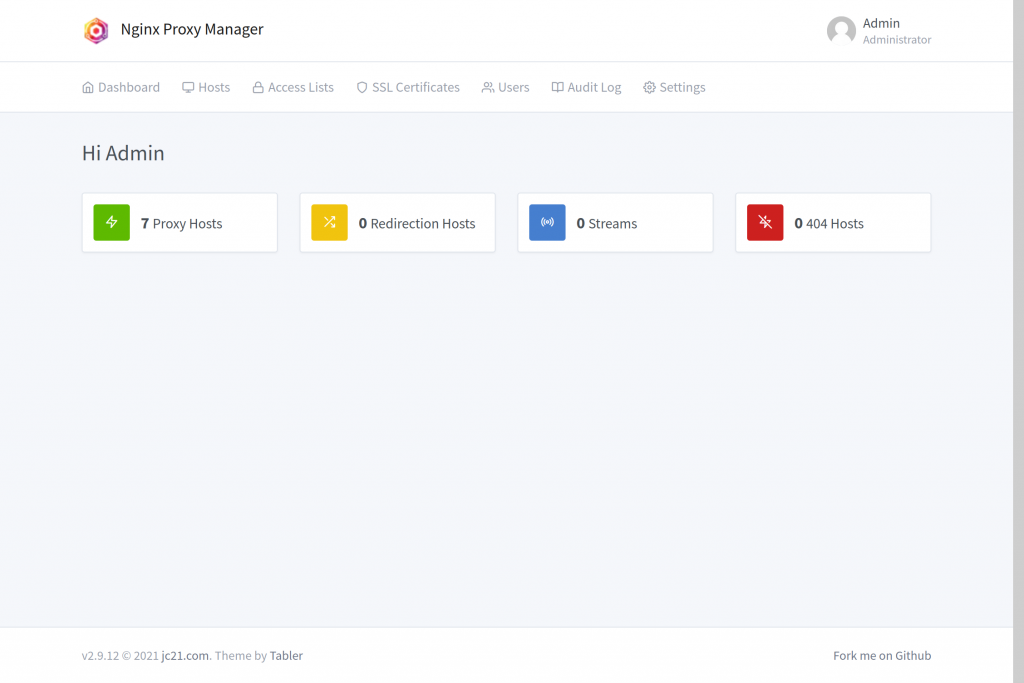
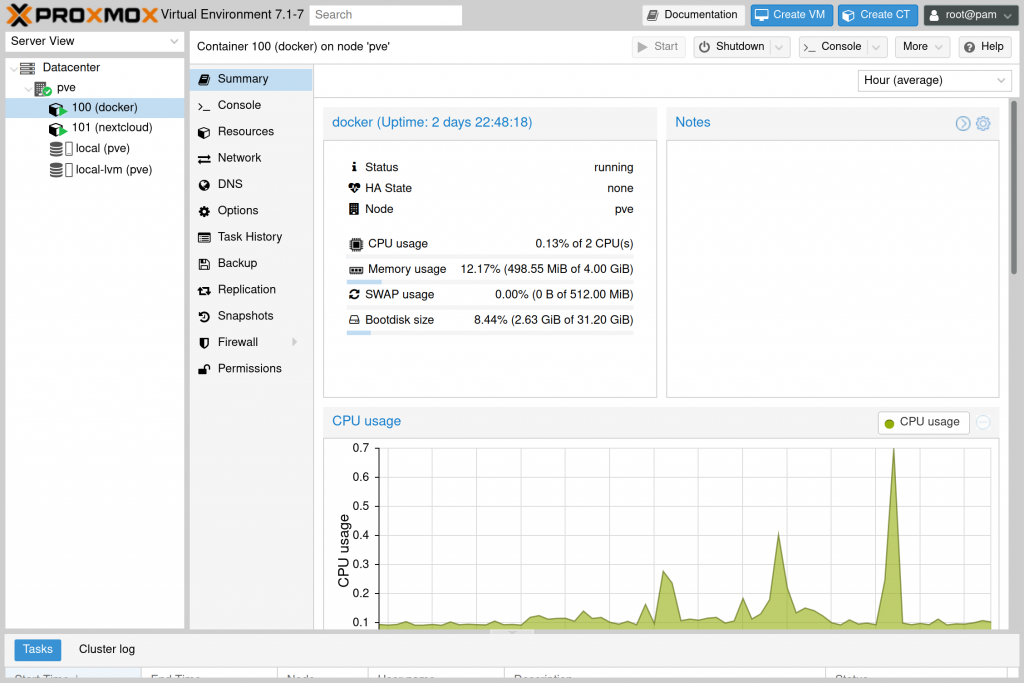
Nginx Proxy Manager is only available as a docker container, so there is some steps involved with installing on Proxmox server, which are:
- 1) Create a Linux operating system LXC container by downloading a template
- I used the debian-10-turnkey-core_16.1-1_amd64.tar.gz template which is a Linux OS base on Debian
- 2) Install docker and docker-compose
- 3) Used docker-compose to create the Nginx Proxy Manager image in Docker
Watch these informative videos on how to do this by Geeked on youtube:
- Docker in Proxmox V7 LXC with Turnkey Core – Lower Resources by 80% Compared to VMs
- Super Simple Cloudflare and Nginx Proxy Manager Setup Using YOUR Domain
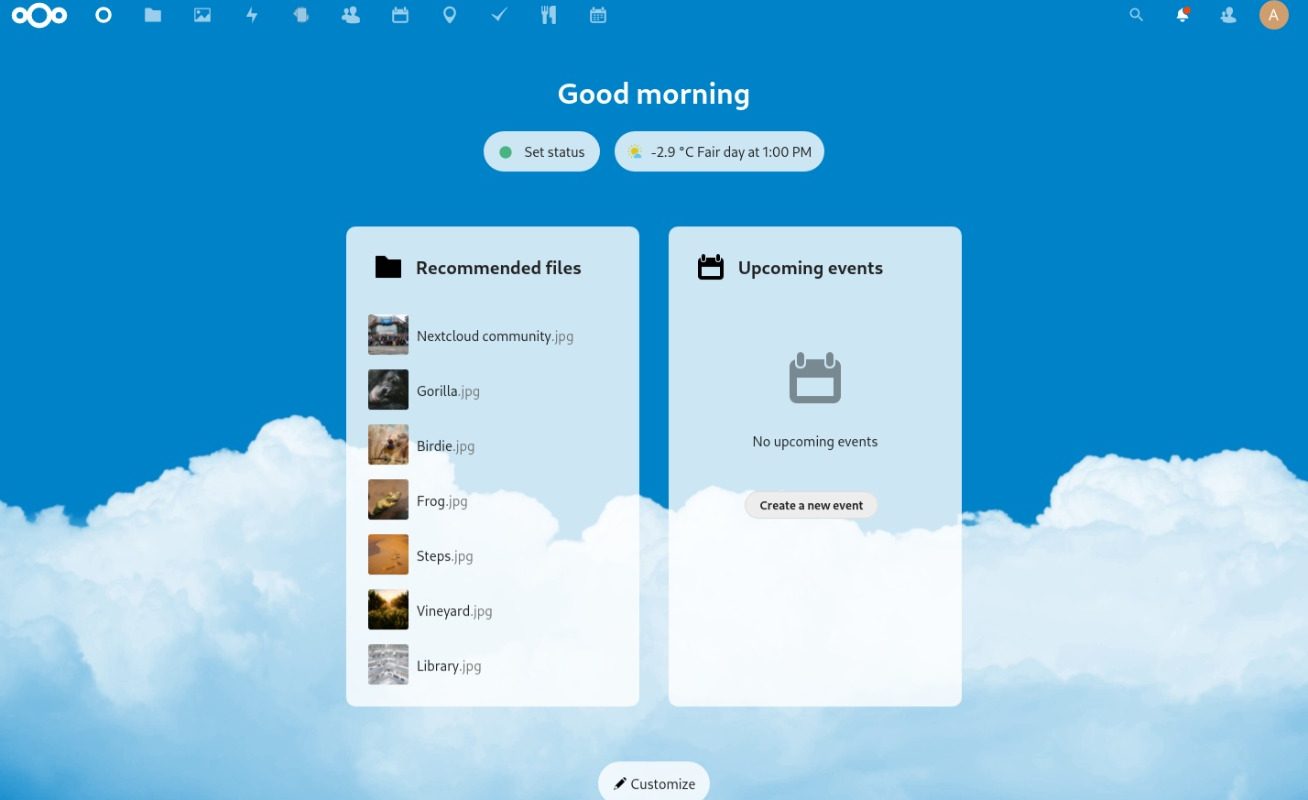
Install Nextcloud hub!!! ….finally
There is a docker image for Nextcloud, but I don’t want to put it on the same Proxmox LXC container as the Nginx Proxy Manager. If something gets corrupt in that one container then i would have to rebuild both images. Luckily, Turnkey makes an LXC image that containers Turnkey-core and Nextcloud together which makes it supper easy to install called debian-10-turnkey-nextcloud_16.1-1_amd64.tar.gz.
Watch the youtube video from Virtualize Everything called “How to Install Next Cloud using Turnkey LXC Image” for instructions.
Conclusion!!
After all of this process, I was able to make subdomains in Cloudflare that pointed to my home IP address. Then in Nginx Proxy Manager, I was able to assign the ip addresses that belong to services on my home network to those subdomains. The Nginx Proxy Manager also created SSL certificates from Let’s Encript for each of the subdomains to secure them. Now when I type “nas.example.com”, I can directly connect to my Synology NAS from anywhere. With my Nextcloud hub cloud service running, I can use it like google cloud for calendar, documents, pictures, and much more.
As always…Thank you for reading and feel free to leave a comment or ask a question.
~Cheers!!!
Alan


Thanks for sharing your thoughts on website. Regards
In case you are in search of a Television that goes to make your neighbour’s jaw
drop, then a curved one might be simply the factor you might
be searching for. The children being nice followers of the marvel
superheroes can embrace themselves in the avengers group.
With that being mentioned, I’ve seen a number of purchasers who have had success with the characteristic
of their surroundings so I’m anxious to test it out now that Lync
Server 2013 has RTM-ed. With that being stated,
for those who don’t have any cellular or non-area joined devices in your environment, you should utilize an internal Microsoft Enterprise CA to your View connection server certificates.
Alternatively, you should utilize the PowerShell cmdlet Move-CsUser to move the users.
Install Windows Roles and Features (including MSMQ): Rather than manually going by Server Manager to put in the
roles and features, the next PowerShell cmdlets can be used to mechanically set
up all of them. I haven’t gotten to installing the Universal Device Server
for iOS and Android phones but will do soon.
Also word that I intend on installing Blackberry
Device Service. Note that it’s best to ignore the mgs
database because that belongs to a Persistent Chat
(the brand new Group Chat) deployment.